.comment-link {margin-left:.6em;}

The Crow's Nest

A bird's-eye view of the world.

My Photo
Name:
Location: Adena, Ohio, United States

Saturday, July 29, 2006

Pictures of house and land


This is the front of our house.


This is the left side, with the garage entrance. Above the garage is our library and Corvus's office.


This is the right side. The steps go up to the sunroom, which is our pantry.


This is the back. The bottom part is the garage, which connects to the basement.


Our land, looking south from the northern end.


Some of the forest on our land. This is near the creek.


More forest, this time near the road.


Looking north from the southern end of the cleared area, just past the start of the trees.


One view of our creek. It defines one long side of our property, while the road defines the other long side. They're roughly parallel. In this photo, the creek is higher and muddier than it normally is because there had been a lot of rainfall over the previous few days.

More linen closet

Corollary to Mel's Law of Renovation #1: Things will always cost more than you expect.

I picked up the lumber for the linen closet shelves yesterday. It ended up being around $65. I could have bought cheaper wood, but it was all pitted and rough. Since these are indoor shelves, I decided that the paint-grade boards were the best bet.

After I got home, I realized that I had bought one shelf too few. However, I think I'll just leave the top shelf off. This will give more space for bulky things like quilts, of which we have a lot.

Today I started prying off the old shelves. Apparently, underneath the tar-stuff and two layers of paint there were nails holding the shelves onto the braces. Obviously, there was no way I could get at those nails so I ended up banging on the underside of the shelves with a hammer until they came up. So far, I've removed two levels, with three more to go.

Friday, July 28, 2006

Linen Closet Woes

Our house has the advantage of a very large linen closet in the upstairs bathroom. The disadvantage is that there was mildew on the walls. So I bought some anti-mildew bathroom paint and set to work scrubbing the walls down with a bleach solution. There was some nastiness when I had to scrub a spot where large quantities of soap had been spilled. It had soaked into the shelves and it took several changes of water in the bucket to get it all. There was also a spot with mysterious black stuff that appeared to be coming from under the old paint. Yuck.

The wooden shelves had strips of metal screwed to the edges, so I set about unscrewing them. That way I wouldn't have to worry about keeping the paint off of the metal. Unfortunately, many of the screws were so tight and of such a soft metal that they preferred to strip rather than unscrew.

I took a break to survey what I had done so far. I noticed that on the shelves where I had managed to remove the metal strips, it was obvious that there was some sort of black layer on top of the wood. It turned out to be some sort of foam cover that was glued to the shelf with something resembling tar. Aha! So that was the black stuff I had tried in vain to clean earlier! Underneath this cover there were at least two layers of paint. I know this because one of the layers came with the foam when I pried it up. If this stuff had been applied to bare wood, I don't think I could have moved it at all. At least not without some sort of softening chemical. As it was, there are still gobs of the tar-like adhesive stuck to the shelf.

At this point, I think it would be easier to rip the shelves out and replace them. They look like simple 1X8 boards, so that should be easy enough.

Mel's Law of Renovation #1: Every repair will take far longer than expected, and be more complicated than it at first seemed.

Wednesday, July 19, 2006

Fixing a Hole (and Scraping Some Putty)

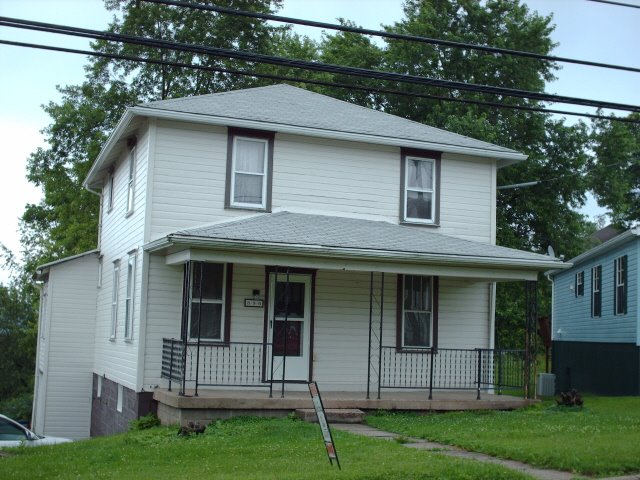
Now that we are in our new house (see Corvus's blog for details), I suspect that most of my posts will now be about the renovations and repairs that I am doing.

A few days ago I noticed that the drain pipe near the basement stairs was leaking just a little, particularly when large amounts of water were draining at once (such as emptying the bathtub). According to the book "Renovating Old Houses," the way to fix it was to apply a "bandage" of alternating layers of cloth and plaster of Paris. So today we went to Lowes and bought plaster and a putty knife to apply it with. I quickly learned that a putty knife doesn't work well when applying plaster to a curved surface such as a pipe. I ended up just scooping it up and smoothing it with my fingers (protected inside rubber gloves, of course). The bandage seems to be working nicely.

When we first moved in, all of the windows had been caulked shut by the previous tenants. According to the neighbors, this was in an effort to keep warm. Now, I don't know how warm they were trying to keep the house, but caulking the windows isn't going to help much. At first, Corvus and I were thinking that we'd need to completely replace the windows, but now I'm not so sure. I've been reading up renovating old windows, and I think it's doable.

I've been taking the windows apart and removing the sashes in order to scrape the caulking off. Of course the sash cords are all broken, so the windows are difficult to lift and don't stay up without being braced. Also, the cord pulleys have all been painted over, and in some cases the opening was stuffed with newspaper before hand. I was beginning to get a bit worried that the counterweights would be missing, because those aren't available anymore (except at antique shops and the like). However, tonight I opened up the access panel in one of the windows and found that the weight was still there, frayed cord and all. So I think it's likely that the rest of the windows still have their counterweights too.

I'm actually getting pretty excited at the thought of renovating these windows. I'd much rather preserve the look of the house than have brand new windows that will look out of place.